Anthony's hat for his black mage costumes is done! Very exciting. I was a little nervous about making this hat, but in the end it turned out well, I think.

Clearly, that's not him, but I'll get a pick of him in the hat yet!
The hat only took an hour to draft, cut and sew. In addition to being a breeze to make, you only need about a yard of 72" felt to make it (I got lucky and found a remnant at Jo Ann's – 50% off!), so this is super cheap too (especially because around this time they put all the felt on sale for about $2ish/yd).
Anyone interested in a tutorial?
18 October 2010
Black Mage Hat
Slapped onto page by; ♥Mistress Rivkah♥ at 2:11 PM14 October 2010
Wark!
Slapped onto page by; ♥Mistress Rivkah♥ at 9:04 PM.
___/),.._
/' ,. ."'._
( "' '-.__"-._ ,-
\'='='), 3\ -._-"-. -"/
/ ""/"\,_\,__"" _" /,-
/ / -" _/"/
/ | ._\\ |\ |_.".-" /
/ | __\)|)|),/|_." _,."
7 \_." " ") | ).-""---''--
( "/.""7__-""''
| 3 ."._--._
\ \ (_ __ "" ".,_
\.,. \ "" -"".-"
".,_, (",_-,,,-".-
"'-,\_ __,-"
",)" ")
/"\-"
,"\/
_,.__/"\/_
ctr / \) "./, ".
--/---"---" "-) )----
12 October 2010
Ichiroya Review
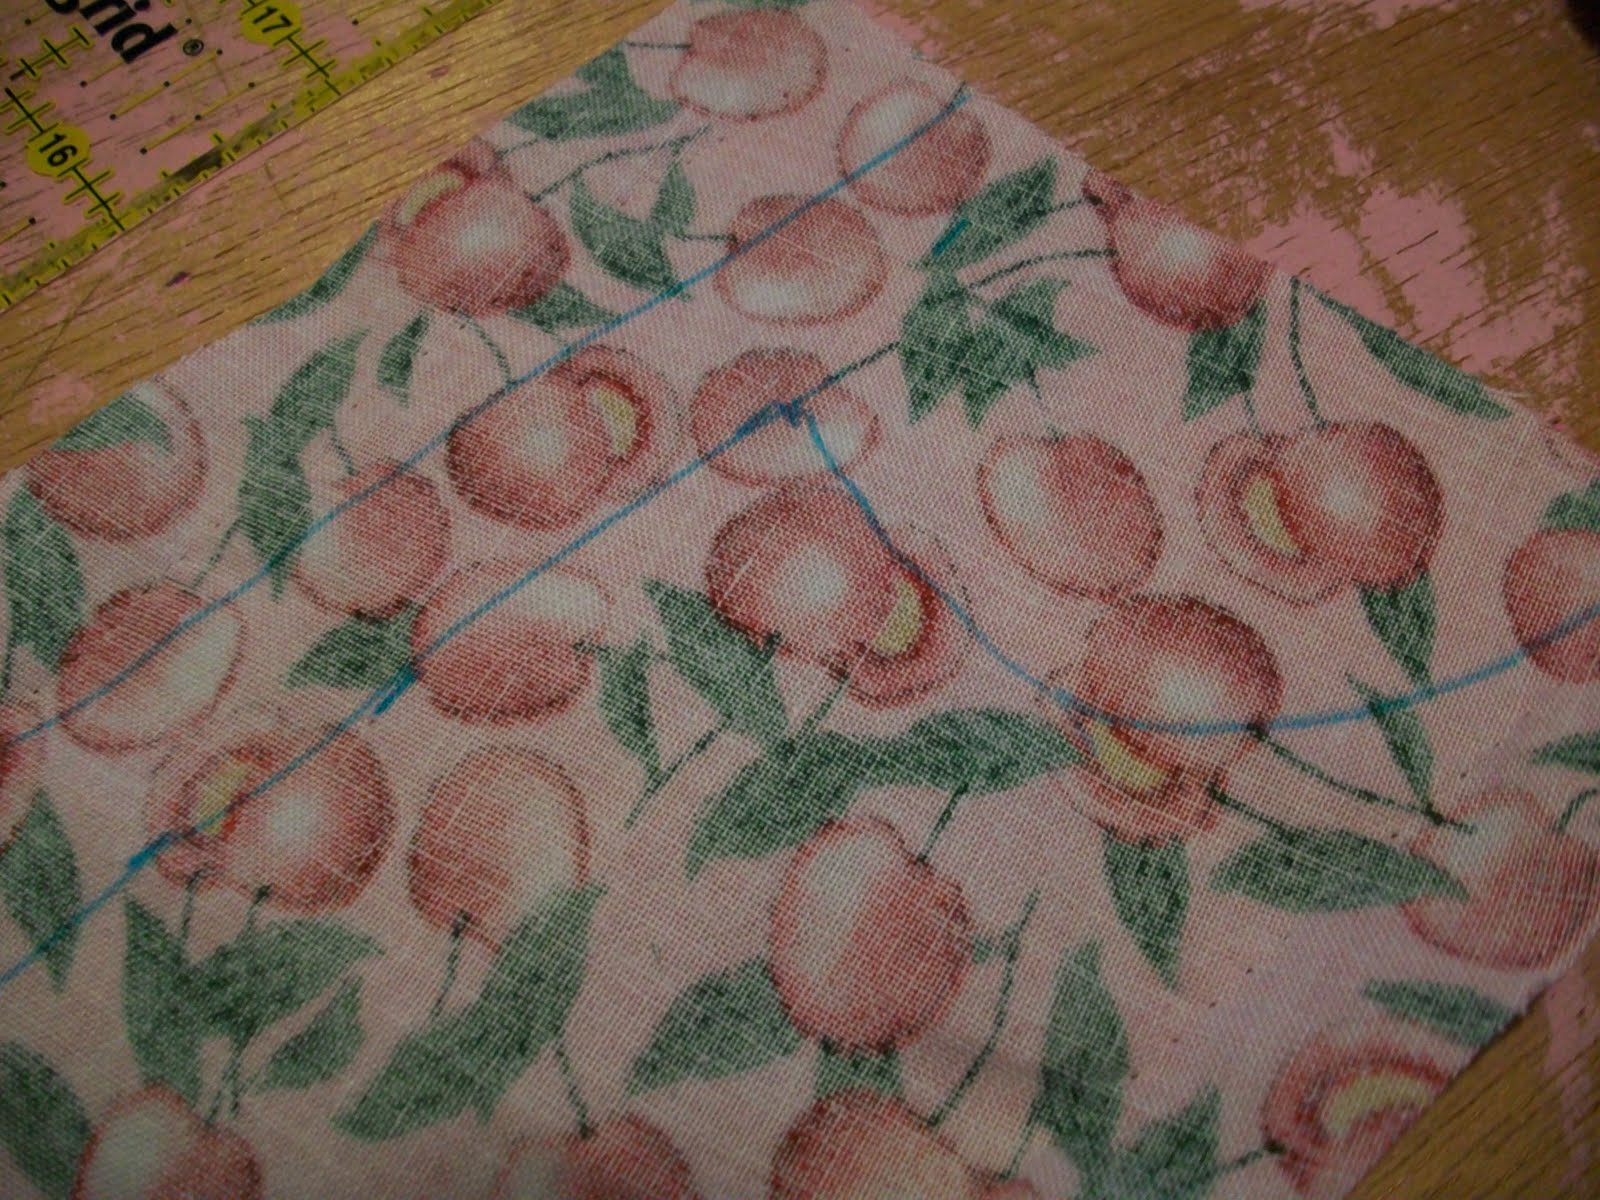
Slapped onto page by; ♥Mistress Rivkah♥ at 7:14 PM The fabric is here! So, as promised, here is my review of ichiroya.com.
Overall Rating (5 max): ✯✯✯✯✯ Order Placed: 29 September 2010 Order Received: 12 Oct. 2010
Reference page: http://www.ichiroya.com/item/list2/151542/Fabric: silk
Technique: dyed and woven Size Width: 14.5" Length: 472.5"
History: quite new
Condition: excellent
Price$78.00 $38.00
Fabric as pictured on website:
Fabric as arrived:
 Good: Ichiroya.com has a great selection of Japanese kimono fabrics of various fiber content, age, condition and price range. They accepted my payment promptly and my fabric arrived in less than 2 weeks. Their pricing seems fair, as does the shipping charges. The fabric was as pictured and as described on the internet. I didn't have to contact the company so I can't report on their promptness in this area.
Bad: There are way too many choices on this site!
Overall: I would defiantly shop from this site again!
05 October 2010
Halloween Costumes!
Slapped onto page by; ♥Mistress Rivkah♥ at 10:47 PM
Anthony and I were invited to a Halloween party. After much thinking, we've decided to be a version of a white and black mage from the Final Fantasy series. Naturally, I adapted the white mage's outfit from FF III to be more Loli-like, here's my idea:

04 October 2010
Cable Stitch Leg Warmers
Slapped onto page by; ♥Mistress Rivkah♥ at 2:11 AM
Well I can check one thing off my list, the leg warmers for Victoria. Here they are:

What do you think?
I made them with the round red knifty knitter and two skeins (3.5 oz each) of bulky(5) yarn. They took me a week to make, but I could have done it in two days (a day a leg) if not for school and work. I could give the pattern up if anyone's interested. . . 03 October 2010
Update
Slapped onto page by; ♥Mistress Rivkah♥ at 10:42 PM
Okay, I know, I havn't made a report in forever. School started up and work geared up and wow, have I been busy! Here's an update for you if you're interested:
1.My dress is nearly done. The overskirt needs to be hemmed, snaps sewed onto the forepart, snaps sewed onto the removable sleeves, and pearls to adorn the lace on the sleeves.
2. Anthony's outfit needs a lining, a collar, some trim, and to be hemmed. I suppose he needs trousers too. . .
There's only a few weeks left for the faire! So I've got to be quick. My dress is almost done. So I'm not too worried. I'll feel bad if I can't get Anthony's done, but I feel like I can do it!
Victoria told me she wanted a pair of legwarmers for her birthday, so I found some pretty pink chunky yarn at Jo Ann's and have already knitted up one and a half! This year I may have her gift to her on time! I'll post a nice pic of them when they're all done, which should be soon, for real :} . I'm making the leg warmers with the red knifty knitter. I love knitting looms! So easy, and you can make all the real stitches of knitting without all those needles.
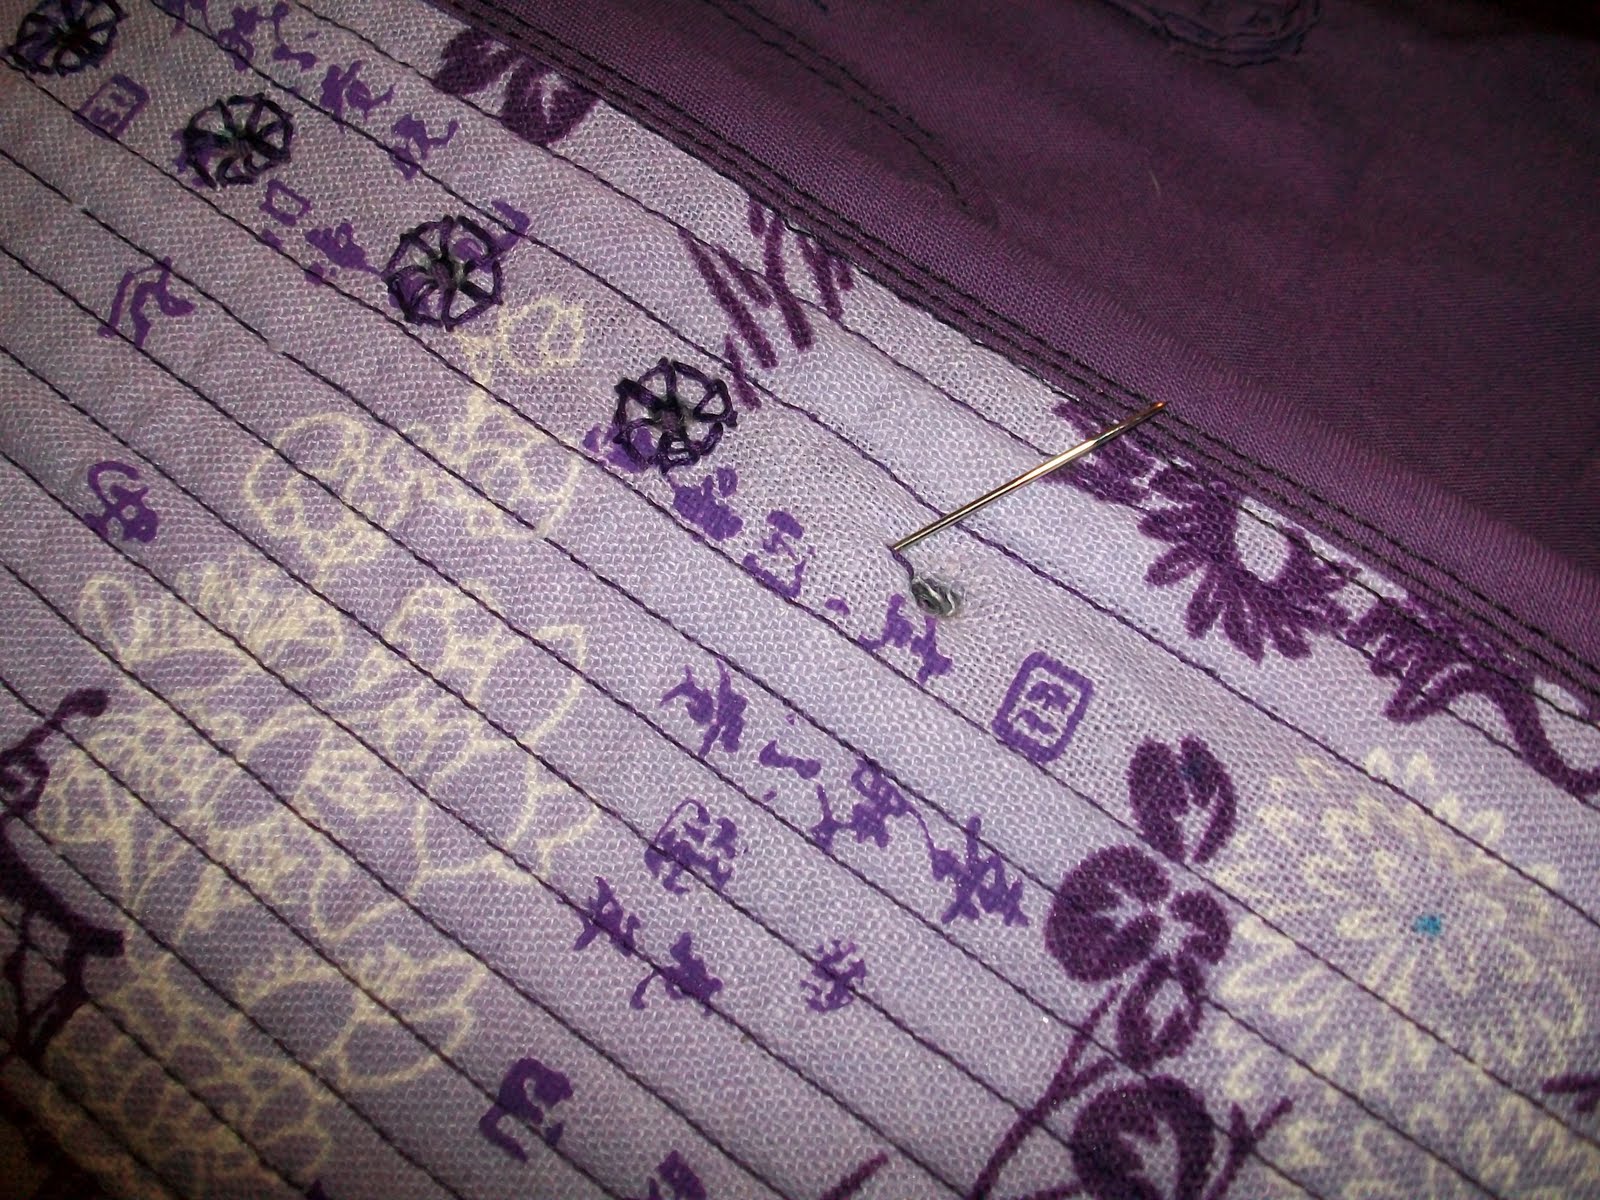
This semester, I had to take a speech class, which sucks – I am an awful public speaker. The upside is, I can use myself as a visual in my final speech. For my speech, I chose Lolita fashion as my topic! Yay! I hope it won't bore my audience. . . for my speech I will make a power point show, and a Lolita dress, I bought a pretty bolt of (what I hope is) pink kimono silk from ichiroya.com, to make a Waloli style dress. I've never ordered from this place before, but have been ogling their wares for 10 years online and in person at various fairs and events. Here is the link to the silk I bought: http://www.ichiroya.com/item/list3/151542/ . I'll update with pictures and a seller review when the fabric arrives. The fabric is a little pricey, I know. But given that it is silk with an authentic Japanese pattern, I was able to justify it to myself. Also helping in my justification is the burning desire I have for a lovely pink WaLoli dress to wear to the cherry blossom festival. It's just the perfect outfit to have for that occasion. (:
I'm going to go work on those legwarmers some more, but before I go for now, let me leave you with a list of things to come:
1. Pictures and pattern review of finished Elizabethan gown
2. Pictures of Anthony's finished outfit (pattern was self-drafted)
3. Pictures and possible pattern for leg warmers (time depended – pictures for sure though)
4. Seller review for http://www.ichiroya.com/
5. Waloli dress drawing board
24 September 2010
I made you a cookie!
Slapped onto page by; ♥Mistress Rivkah♥ at 12:26 PM
I know - I haven't been around for AGES. Will it make you feel better if I tell you how to turn cake mix into cookies?
What you need:
- 1 box of cake mix (any flavour you'd like)
- ½ cup of fat – this can be any kind of oil, slightly melted butter or margarine
- 2 large eggs
- 1 tsp of vanilla extract
- Chocolate chips and/or nuts (optional)
How to make your cake into a cookie:
- Preheat oven to 350°
- Put your oil/butter into a bowl. Add eggs and whip together. Add vanilla, whip one last time (I used an electric blender, but it's not necessary)
- Empty contents of cake mix into your wet ingredients. Stir until all the cake mix is incorporated.
- Add nuts and/or chips
- Grease / cookie-proof your bake sheet
- Drop cookies mix by rounded spoonful onto sheet.
- Bake for 10 – 14 min – or until cookies are a light golden brown. Do not over bake, they'll get really hard and crumbly.

Cake mixes make great impromptu cookies. Most grocery stores run killer sales on mixes (I got 5 for $5) so they're an affordable thing to keep on hand so that you could whip up tasty treats on short notice, or on a hunger whim. This trick is also a good project for kids and there are a lot of ways you can have fun and mix it up:
Instead of butter or oil for fat try ½ c of:
- Applesauce
- Purred banana
- Pureed pumpkin
Try adding seasonal spices to your mix like pumpkin pie spice
Add some dried fruit or oatmeal to your cookies for a yummy trail mix treat,
Get creative and have fun!
10 August 2010
Moving on
Slapped onto page by; ♥Mistress Rivkah♥ at 2:16 PM

The corset is done! Has eyelets and all! Here I am in all its glory.

The next thing to do is to make a dress to go over top – can't walk around the faire naked! (although my boyfriend insists the chemise and corset is far too many clothes already)
To make a dress that fits properly, you've got to have your dress double set up right. Put on all your underpinnings and take your measurements. Next, deck your double out in all your underpinnings. Because the dummy can't squish like me, I set her up to have my corset measurements and tie the corset on as well as I can. Now measure her and make sure she matches up with your own.

I've begun with the muslin of the bodice. Cut out your pattern – I always cut a size too big. It'd rather resize with too much than too little. Take your creation and pin it on the double. Take your pins and fit that bodice!
If you've cut a pattern too large, you will have alterations to make.
 |
| Woah! too big! |
 |
| Those pins make a tailored torso! |
 | |
| The blue line means, "Cut here so you can more your arms!" |
After everything is cut to size and seam allowances added,
 |
| The needed seams in dashes |
 |
| Connect the dots! |
 |
| Cut on the blue one! |
 |
| Ah, perfection! |
I make a copy in pattern ease. It holds up better than paper or tissue. I intend to use this pattern again and don't really want to have to fit it every time x_x. I'm going to turn this muslin into a flatline for the actual outer fabric so that the satin has a nicer body.
Bound Eyelet – Type 1
Slapped onto page by; ♥Mistress Rivkah♥ at 1:31 PM
Let's bind some eyelets! This is one way I know; maybe you'd like to try? I took lots of pictures so I hope they help and give you confidence to try this yourself.
Before the how to, let's think – why would you chose to bind an eyelet rather than apply a grommet? First of all, it's period (period meaning it's what they would have used before 1830). In addition to being historically accurate, they're easier to apply that the metal grommets if you like upper body strength like I do, you don't have to worry out them popping out, and you don't need specialized tools.
Alright, the how to:
Materials:
 Seam gauge: needed to you can space the holes accurately
Dressmaker's pen or pencil: to make out the eyelets
Needle: to help you pull the thread through the fabric, of course – choose one in a heavy gauge if your corset has a substantial interlining!
Thread: choose one that is STRONG! Try upholstery thread, some hand quilting threads, or machine embroidery threads. Remember that lacings are going through those eyelets and rubbing over your stitching. Pick a thread that can withstand it.
Awl, sharpened stick (really, no joke)/pencil: to make the holes. Something pointy like those will stretch the fabric and prevent ravelling. You can also use scissors or that weird hole punch thing that you buy at Jo Ann's to set grommets, but remember that once you cut into the fabric, it becomes weaker.
Ruler: lets you make sure the eyelets are in a straight line.
NOTE: These instructions are being written referring to your corset. If this is your first time trying this method, please try it out on scrap fabrics! Everyone needs to practice skills before they go to their corset >_<.
Steps:
Find your eyelet channel. Take the ruler and with your dressmaker's pen draw a line from top to bottom of the corset right down the middle. This will let you set your eyelets in a nice strait line.
Decide how your eyelets will be spaced. Take your seam gauge and dressmaker's pen and plot out where your eyelets will be.


Take your pointy implement or scissors or punch, and make the eyelet holes. It may seem scary at first if this is your first time making a corset, but don't worry – you need to do this! If you're using a sharpened skewer or pencil to make your holes, please be very careful and mind your fingers!! Last thing you need is blood all over your pretty corset! 
Holes all in? Good. Grab your thread and needle and cut a very long piece of thread. Then match cut end to cut end of thread and put both cut ends through the needle. Tie all cut ends to the loop side so that you're sewing with 4 threads instead of one or two.
Ready now? Take a deep breath and let's go: insert the needle into the back side of the corset and pull through to the front. Put the needle through the hole. Insert the needle through the threads just under the knot and pull to secure,
Push the needle through to the front near your first stitch. Pull thread through all the way, pulling tight.
Put the needle through the hole, push through back half way.

Wrap the thread behind the needle. Pull needle though front of corset. 
Take a stitch over the stitch you just made to secure "L" shape.
Insert the needle close to your last stitch from the back and repeat. Keep on and it will look like this:

To finish the eyelet, continue doing what have been doing to make those "L" shapes. When you make your last securing stitch, tie off the threads on the underside of the corset.


05 August 2010
Bound to You
Slapped onto page by; ♥Mistress Rivkah♥ at 3:50 PM
My corset is finally bound! I took the easy way out, I think. I did it with my machine in a rather haphazard way. I don't really recommend this technique. In hindsight, as I say with every corset, it probably would have been easier and prettier to do it all by hand. Maybe, as I also find myself saying with every corset I make for myself, I'll rework the binding by hand one day. I'd worry about it more if it was for someone else, but it's only for my use and I'll really be the only one seeing it, so I suppose it will do.

04 August 2010
Hell Dress
Slapped onto page by; ♥Mistress Rivkah♥ at 12:54 AM
Alright! Finally, I have completed the dress. Here it is on my dummy. Hopefully I'll con someone into taking some nice pictures soon.

 |
| Back |
I've christened this dress the "Hell Dress" – why? Well, the original zipper shredded after I put it in, yes shredded! Then my serger went weird and I went through 3 needles! Crazy. Also, during the whole process I had the worse cramps! So, while being under the weather and frustrated, I failed to document this process well. I'm sorry. I'll try to do better on the next project.
During this time, my bones came (yay!) and I have since put them into their proper channels. So now I will be working on finishing the corset and then I can, finally, move onto making my gown! 28 July 2010
Sketchy Business
Slapped onto page by; ♥Mistress Rivkah♥ at 6:28 PM
 |
| who needs a face, arms or legs? |
My sketch is done!
Idle Hands. . .
Slapped onto page by; ♥Mistress Rivkah♥ at 4:04 PM
 I'm bored. . . no bones, no work today, no Otakon to get ready for – what a bummer! I found this fabric in my stash. It's cute. I was going to make a petticoat out of it for a client, but she reneged and luckily I hadn't cut into it yet. I estimate I have about 3 ½ yds. I am soo yearning for Otakon – the cosplay, the pictures, the people, the anime, the wandering around in Baltimore all dressed up and getting odd reactions, the good time with friends – why oh why must I be poor?!?! Damned economy >:[ I'm digressing here, sorry. Okay, pining for Otakon, have 3 ½ ish yards of Lolita-like fabric. . . so why not make a pretty summery Loli dress?
 Now, a lot of Lolita dresses can be over the top, and don't get me wrong – I love over the top, I thrive on over the top, but I want something the boyfriend will let me out of the house in! So, let's plan this thing.
What I want in the dress:
Summer appropriate
the print dictates this
no sleeves or cap sleeves
knee length skirt
full skirt – I have some crinoline if needed
nothing too "crazy"
I don't want to spend too much. I haven't worked all week and school will be starting in a month. I'd like to spend no more than a few dollars on a zipper or smocked fabric so that I can, you know get in and out of the completed garment.
The print is a little busy. Do I want an entire dress dedicated to this print?
 |
| Yay! Options! |
There's no way for you to know this, but there was a 15 min gap between this sentence and the one above. Why? I had a thought as I considered an entire dress made out only of that fabric. In the absence, I dug out 6 yards of red netting and 3 yards of red cotton fabric. Now I have some options! Yes, we love options, don't we?
Alright, let's see some inspirational photos:


Appliqué
Slapped onto page by; ♥Mistress Rivkah♥ at 1:46 PM
She's done! Last night I finished my little Gaia avatar appliqué. I used only materials in my house and she turned out so nicely. What do you think?
 |
| Great for any background! |
 Maybe I'll make appliqués for my Gaian friends next. . .
 27 July 2010
Busy Work
Slapped onto page by; ♥Mistress Rivkah♥ at 4:33 PM
Any Gaians out there, peeking in on me? The kid in me loves Gaia online. The adult in me tells me I need a real life. I'm in love with Gaian avatars. They're adorable! So, as I wait for my bones to arrive, and for the boyfriend to decide what fabric his Hanfu will be made from, I think I'll experiment with a Gaia avatar quilt square. . . what can I find in that stash of mine?

This is my proposed avatar to model. She isn't mine, or anyone's (I hope, please don't sue me!) I made her with the help of tektek.org. My own avatar loves to cosplay as Elena of the TURKS, so it's a bit boring for my purposes of the moment. . . although maybe I'll make a Gaian-turk thing at some point; but let's not pile project on project!
European Alternatives
Slapped onto page by; ♥Mistress Rivkah♥ at 1:38 PM
I've coned the boyfriend what he wants to do is dress up for the Renaissance Faire this year. He agreed! – With a condition – no puffy pants, no tights, no frilly shirt, no shirt with a v-neck, no doublet, no funny shoes – pretty much nothing European. So what does the love of mine want? Chinese garb. Well the Maryland renaissance faire takes place during the Henrician period, which puts China in the Ming dynasty. For the faire he will be wearing a long jacket/tunic over trousers and some sort of shoes, , , sort of in the spirit of this fellow,
 |
| Think Jackie Chan in Shanghai Noon - Same idea, different time period |
I think I want to get into the spirit too with a Chinese inspired dress like this one:

Skeletal Anatomy of a New Corset
Slapped onto page by; ♥Mistress Rivkah♥ at 1:12 PM
So after much researching, internet crawling and debate, I finally ended up just winging the pattern of my corset's boning layout. I left a ½" space at each end for the piping, then allowed a 1/4" pocket for a bone, another ½" gap for eyelets, and followed the gap for the eyelets with ¼" pockets all the way to the eyelet strip on the other side. The original effigy corset is pretty rigidly boned. It's bone – to bone –to bone. Lotta bones. All in all, my own corset ended up with 60 ¼" steel bones. I think I've bullet proofed my costume. . .
 |
| Gap at side of bust |
 |
| Back - you can see the bones only extend as far as the side seams |
I decided to try some things out. The last corset I made had bones butted next to each other continuously from side to side and stuck out funny around my bust and hit my armpits in a weird and uncomfortable way. This time I left a gap of boning on the side of the bust in hopes it might stick out less and be more comfy. Although this could be a pipe dream, we'll see soon. The other thing I did differently from my last corset was cut down on the length of the bones that are in the back of the corset. My previous corset was cut high in the back and the bones ran all the way up. Ick. I cut them shorter this time, once again hoping to make it more comfortable.
I ordered my bones from http://www.dragontowncorsetsupply.com/. They're my normal go-to corset suppliers. They have the best prices for pre-cut boning and offer different busks and lacing bones, if you need any of that as well.
 |
| Finally the white pencil has its day! |
Oh, the other change I made to this corset was my bone channel technique. Previously I have sewn channels to the interlining of the corset. This time I sewed the interlining to the outer fabric to make channels for the bones. This was a lot easier! Plus, I found a use for a white coloured pencil. . . I wonder now if the pocket channels will hold their own against the steel bones like the duck cloth channels do. . .
No I am playing the waiting game of waiting for my bones!
23 July 2010
Needle Pointers
Slapped onto page by; ♥Mistress Rivkah♥ at 3:13 PM
Punch punch punch. . . What's that noise in my sewing room? Is it my subconscious calling for hydration; is it my anger trying to call me to action? Am I keeping track of all the VW's that drive past? I used to work at Jo Ann fabrics. The only decent part of the job was the discount. . . Every now and then a customer would call up with a particular complaint or problem and our conversation would go something like this;
"Hello, Jo Ann fabrics – how may I help you today?"
"Hi – my sewing machine is broken, will you fix it?"
"Sorry ma'am. We don't fix sewing machines; we only sell 'em."
Then, inevitably, the lady on the other end would get frustrated. "But I bought it there and you should be able to fix it!"
So then you'd have to refer her to a sew and vac with many apologies, ask if there was anything else she needed and then get back to the never ending work in the store. However, the story doesn't end there – it just couldn't! Half an hour later you're cutting fabric for a customer, or organizing fabric, or about to take your break, and a machine toting woman comes in, making a b-line for you, slams the machinery down on the counter and demands you fix it.
Now, I'm no mechanic – but I'm not stupid either; and sewing with 5 different home machines, 1 serger, and 1 industrial machine for 10 years had taught me a little in the field of machine anatomy. So I'd look at the machine, plug it in, turn it on. There's a light, the machine can turn on great. There is a bobbin (some people don't know you need a bobbin to sew) and it is wound and inserted correctly, so I let my eyes move up to the thing I'd put money on that was causing the problem – and sure enough, 9 out of 10 times, I am right. The culprit is the needle.
I've seen them in all conditions and misuses. Sharps used to sew knits. Ballpoints for wovens; small gauges for jeans and leathers; large or "universal" gauge needles for silks. But my favourite ones are when you see deterioration of the needle itself. I've seen needles worn so far down that there is no longer a tip, and needles so far gone that it's been worn to the eye!
And so, I'm brought back to punch punch punch. What's that noise? A dull needle striking the fabric. Punch punch punch. You shouldn't be able to hear this – I know better than this, I'm just being lazy. . . For anyone new to this, here are some needle pointers (hee hee) from someone who should know better than to sew with a needle they can hear.
Why is it important my needle should be sharp (for wovens)?
A dull needle causes stitches to be uneven, too loose or too tight. Dull needles will also snag delicate fabrics – something you don't want when you're sewing silks or satins.
Is size important?
In this case, yes. Size, or gauge refers to how thick a needle is. General rule is the thicker the fabric, the heavier the needle. A 14 needle works for denim – not so much for silk! And there are special needles for leather and stretch fabrics.
I don't want to make a trip to the store; won't the sharp work for the stretchy material?
No. The rounded tip of the ballpoint needle allows your needle to bypass the threads to avoid piercing them (like a sharp will do). Piercing the threads reduces the overall stretch of the garment and will increase the likelihood of the garment not fitting well or threads snapping.
How often should I change the needle?
Needles should really be changed with every project. Realistically though, I don't think this happens. Bear in mind, that some material will require you to go through multiple needle changes. Metallic, spangled (sequined), and glitter fabrics will dull your needle in no time and you may be required to make a needle change somewhere during the making of your garment.
Always inspect your needle before sewing. Look for burs, dulling and curvatures. If the needle is defective in anyway, change the needle. If all out fails and you find that you're too often sewing with dull needle, try this: at the end of each project, throw out the needle. When you sit down the next time, you'll be needless and forced to start out with a brand new one.
I hope this helps. If you have any questions on needles or general sewing techniques, feel free to comment.
22 July 2010
Decisions
Slapped onto page by; ♥Mistress Rivkah♥ at 11:25 PM
I'm back. I cut out my new outer fabric for my corset, and then sewed the back to the sides. After the side seams were in, I pressed the seams and laid the interlining and the outer layer out flat and stacked one on the other, and pinned all around the top. I then took the whole thing to the machine and set the stitch on the longest stitch setting to baste the two layers together at the top and fronts.
Now here I have two things to contemplate – a. Do I want to sew on boning channels to put the bones into? B. How do I want the bones to be positioned?

With corsets past I have just sewn channels (or ½ inch strips of duck cloth) onto the interlining in the pattern I want the bones in. I've also seen where people have sewn channels into the fabric by sewing the outer fabric and the interlining together and making pockets for the bones to go into. Now the first method is tried and true for me, while the latter is tempting because it saves me from having to go out to the fabric store tomorrow and having to buy more material. . . Oh what to do. . .? I think I'll crawl around on the web to help.

In regards to the matter on bone placement, the source of my pattern, The Tudor Tailor (ISBN 0713489855), suggest the boning be arranged this way (the top image) awful lot of bones! Even so, my previous entanglements with Tudor wear tells me this is necessary to provide that cylindrical silhouette. The pattern I used is awful similar to the effigy corset. . . I think I'll steal a look at others. . .
Subscribe to:
Posts (Atom)